iPhone photo location settings
The Camera app on your iPhone or iPad is simple but powerful. It can automatically focus and refocus, expose and re-expose, on whatever part of the image you like. You can even bias the exposure with a swipe. If you want to better frame your shots, you can turn on the grid. And you can turn geo-location on and off to either track your photos or protect your privacy, whatever you prefer.
- How to lock the focus and exposure
- How to bias exposure
- How to enable grid lines
- How to enable GPS geo-location
How to lock the focus and exposure
- Launch the Camera app from your Home screen or Lock screen.
- Tap the screen to choose the part of the image you want to focus on and expose.
- Tap and hold on your focal point until you see an AE/AF Lockbanner appear at the top of the screen, to lock exposure and focus.
- Tap the shutter button when you're ready to take your photo.
- Tap anywhere on the screen to unlock the focus and exposure again at any time.


How to bias exposure
You can swipe up or down to bias the exposure and make your photos brighter or darker. You might want to do this, for example, to reduce "noise", better capture a fast-moving target, or simply to better match your mood or the mood of the scene.
- Launch the Camera app from your Home screen or Lock screen.
- Tap anywhere on the live preview in order to bring up the focus point.
- Tap and hold on the exposure button that appears next to it (it looks like the Sun). You'll now see a slider that allows you to adjust the exposure.
- Drag your finger up or down in order to bring the exposure bias up down — in other words to make the photo lighter or darker.


You can bias exposure from -8 to +8 f-stops.
How to enable grid lines
If you need a little help establishing the "rule of thirds" for your photos, you can turn on the camera grid in Settings.
- Launch the Settings app from the Home screen of your iPhone or iPad.
- Tap on Photos & Camera. You have to scroll down a bit to find it.
- Tap the switch next to Grid to turn it on. It's about half way down, under the Camera section.


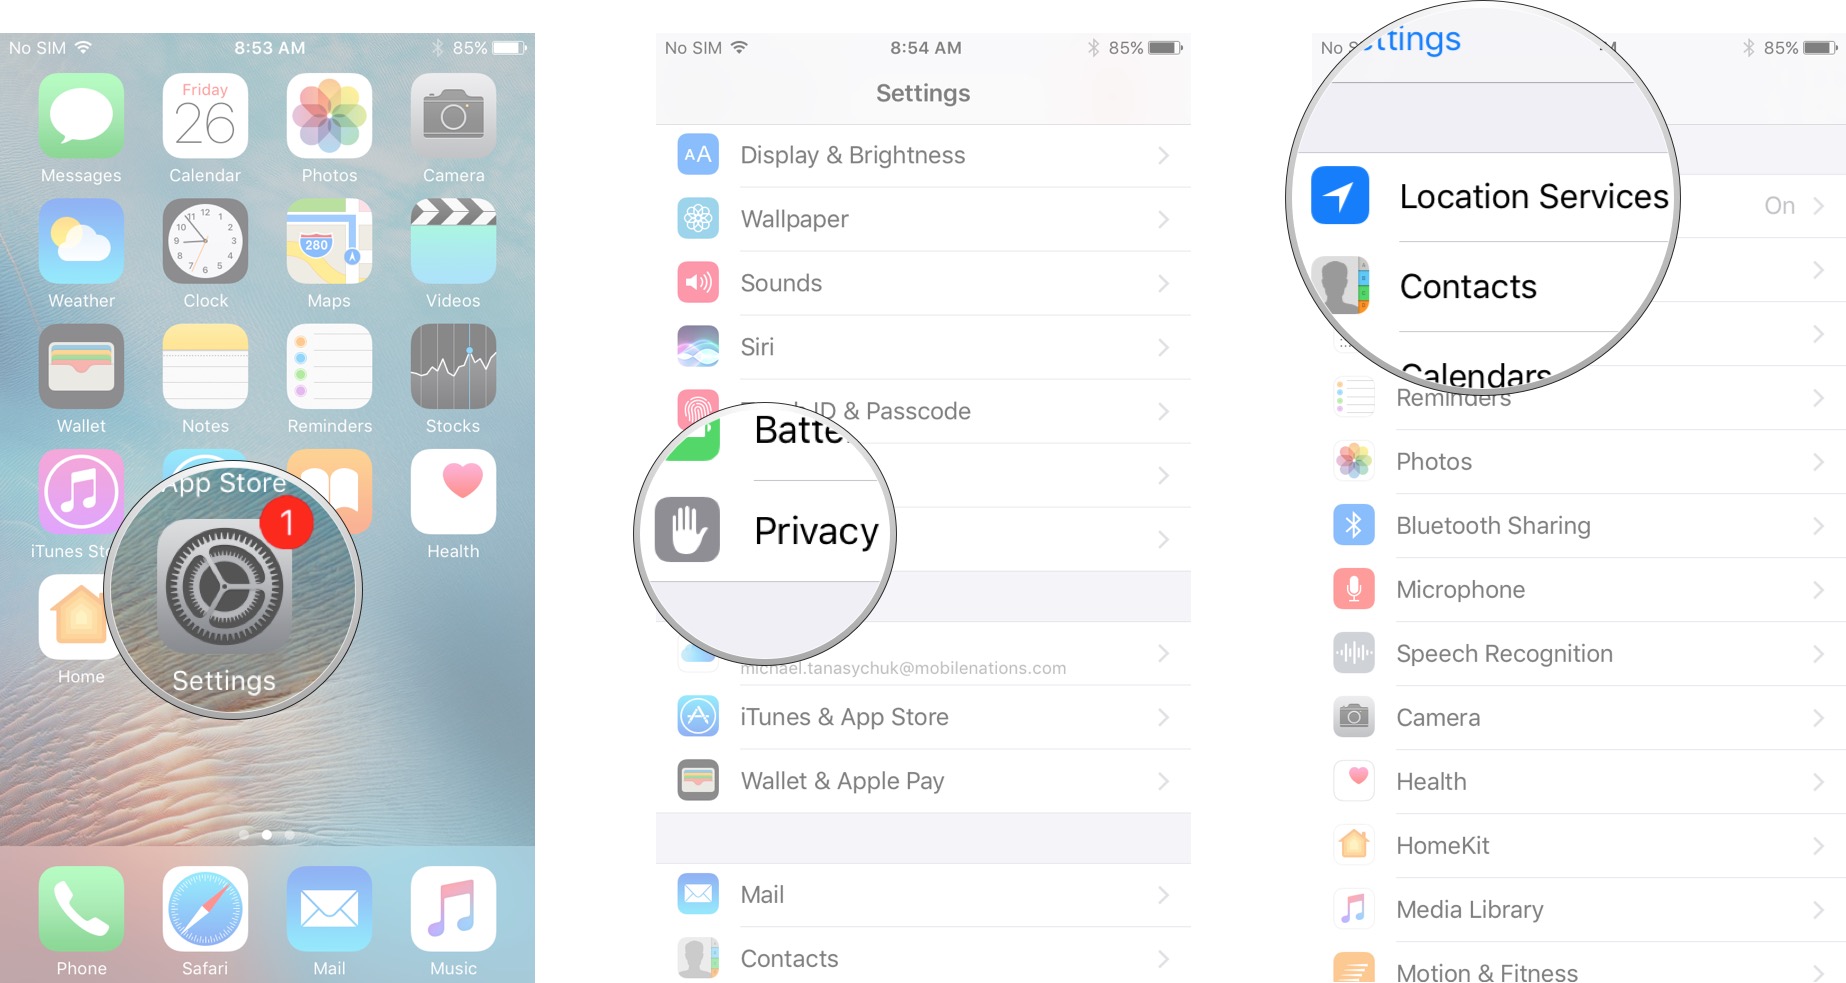
How to enable GPS geo-location
Geotagging is great if you want to keep track of where you took your pictures, like on a photo walk or a vacation, but if you want to protect your privacy and keep your location undisclosed, you can do that too.
- Launch the Settings app from your iPhone or iPad Home screen.
- Tap on Privacy.
- Tap on Location Services.
- Tap on Camera.
- Choose either While Using the App or Never.


You can change your mind as often as you like, turning geotagging on when you want to use it, off when you don't.
iPhone photo location settings
![iPhone photo location settings]() Reviewed by Daniel Chuks
on
07:07
Rating:
Reviewed by Daniel Chuks
on
07:07
Rating:
No comments